Saturday 15 August 2020

My daughter Aleeza's design

 Hello sweet bloggers,

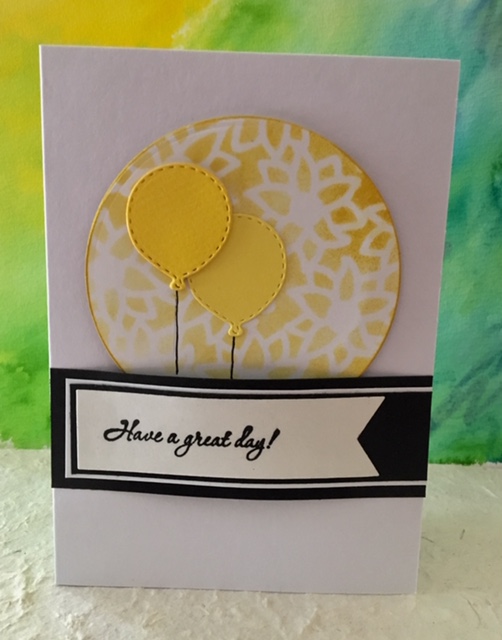
There was some diecuts and lying around on my art table with the yellow stencilled flowers you see on the round nestie here. Aleeza stencilled the flowers with distress ink and she laid it all out for me. And here is the final card. I propped up the yellow stencilled round nestie on corrugated board and the sentiment banner was raised as well after giving it many layers. The balloon on the left was given three layers and the strings are hand drawn. 


I will take part in the following challenges with my card:
http://simplycreatetoo.blogspot.com/ - black and white plus one more colour


Monica 

Friday 14 August 2020

Peaches and cream

Hello dear bloggers,

I stamped this image many years ago and every time it brings me so much joy to use it. I know I should be mentioning the names of the stamp etc but you know I am sitting too comfortably on my big Lazboy to get up and find the name for you. So please do overlook that. I stamped the image with distress ink and coloured in with watercolour pencils and went over it with Prismas to add more life to the flowers. The edging was coloured in with a Prisma pencil as well. I only coloured the edges of the cardstock under the image instead of using a whole sheet of coloured paper. Frugal crafter me. The bottom has two layers of lace for added effect. No sentiment here so as to make it more flexible.

 
I will take part in the following challenges:
https://laviniaworldchallenges.blogspot.com/ - anything goes rubber stamps or clear stamps


Monica 

Thursday 13 August 2020

Vellum over neon

Hello sweet bloggers,

My younger one made the background here with Mala paints directly on to a piece of cardstock without using a pencil. All was well until I thought I should go over the flourishes again and it got all messy. To save the card, I stuck a vellum sheet over it. Another layer was stuck under the paper with flourishes and it was painted fluorescent pink paint on its edges. I seem to like this card at certain times and not at others. I stuck a strip of cardstock to hold the vellum in place and another thin strip with Happy Birthday stamped on it. A few dots in fluorescent pink completed it. With the vellum, you will not need sunglasses to view this card. Lol.

 
I will participate in the following challenges with my card:
artydivas - anything goes


Monica 

Wednesday 12 August 2020

Happy, fun, celebrate

Hi bloggers,

Here is another happy card to show you today. I stencilled the sentiments with a distress ink and found it looked a tad bland inspite of the sunny colour. After much deliberation, I die cut balloons out of recycled paper (juice cups, Body shop packaging and cake boxes) and hand drew the strings before sticking them. The ribbon is hand tied as well.  My girls really like this card and so did I finally.


I will participate in the following challenges:

https://shoppingourstash.blogspot.com/ - Keep it clean and simple KISS

Monica

Tuesday 11 August 2020

A happy chappy card

Hello dear bloggers,

My younger one painted a thick piece of card with fluorescent paints and I stuck it on to a card base. She also wrote the sentiment and it was all set to go. Simple yet fun.

 
I will enter the following challenges:


Monica 

Monday 10 August 2020

Monochromes

 Hello lovely peeps,

Here is a card to show you today which has been created with distress oxides and Mala paints. The leaf on the right has been inlaid while the one on the right has been stuck over it. The background was done with an acetate sheet and distress inks. 


I will participate in the following challenges with this card:

Monica

Sunday 9 August 2020

Fourth Mindful Art and Card Workshop

Dear bloggers,

Here is a card that my student and I created with a stencil and distress inks. We were working towards masking off a section in the lower middle without using masking tape or anything else. We were successful and all seemed well until we stamped a sentiment.  So a strip of cardstock was used to hide the faux pas. 
Ribbon at the bottom with a hand tied knot completed the picture. 

It was a happy ending and that is all that matters. Lol.


Here is my very charming student.


I will enter this card in the following challenges:


Monica